How to Replace a Single-Pole Light Switch Safely
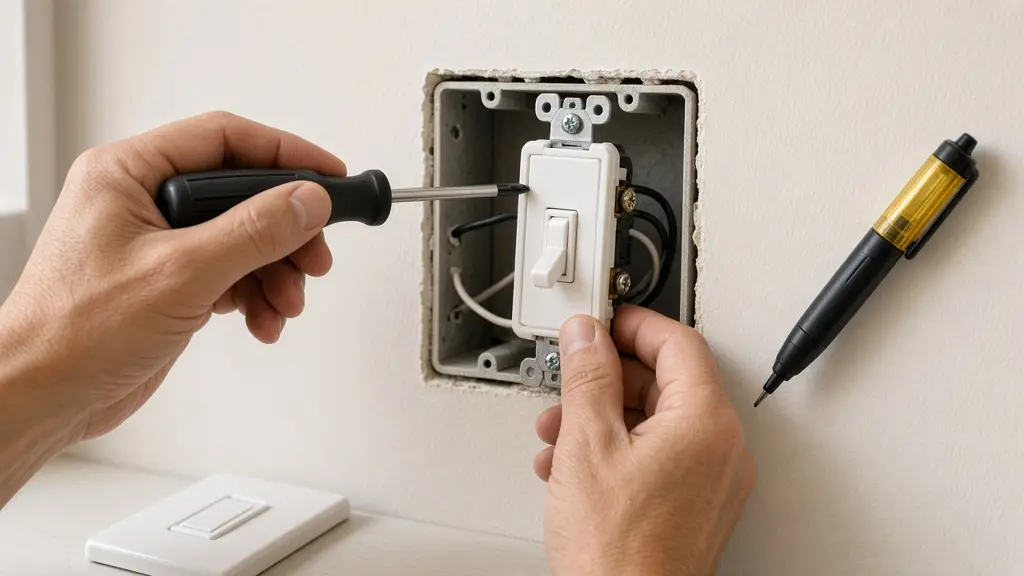
A light switch that crackles, feels loose, sticks, or only works if you press it just right is worn out. Replacing a standard single-pole switch, the kind that controls a light from one spot, is one of the more approachable electrical jobs in a house. It is still work on household wiring, though, so this guide puts safety first and is clear about where you should stop.
Safety first: Always turn off the circuit at the breaker panel and confirm the power is off with a tester before touching any wires. If you are not comfortable, if your local rules require a licensed electrician, or if anything inside the box looks different from what is described here, stop and call a licensed electrician. The National Fire Protection Association (NFPA) advises having electrical work done by a qualified electrician, and the right choice for you depends on your skills and your local code.
Before you start: is this the right job?
This guide covers replacing an existing single-pole toggle or rocker switch with the same type of switch. Do not use it for:
- 3-way or 4-way switches (a light controlled from two or more places). These have an extra "common" terminal and travelers.
- Dimmers, timers, smart switches or occupancy sensors. Many need a neutral wire and have their own wiring diagrams. Follow the manufacturer's instructions or hire an electrician.
- Aluminum wiring (dull silver-colored conductors, common in some homes built in the mid-1960s to 1970s). Aluminum branch wiring needs special devices and techniques; call an electrician.
- Boxes with scorch marks, melted insulation, brittle cloth-covered wire, or a burning smell. These are signs of overheating, a fire risk that needs a professional.
Also check your local rules. Permit requirements and whether homeowners can do their own electrical work vary by state and city. Renters should ask the landlord.
Tools and materials
- Replacement single-pole switch with the same rating as the old one (check the amp rating stamped on the old switch, commonly 15 A; it should match the circuit)
- Non-contact voltage tester, and ideally a plug-in outlet tester or multimeter you know how to use
- Insulated flat and Phillips screwdrivers
- Needle-nose pliers
- Wire stripper (only if you need to re-strip a damaged wire end)
- Flashlight or headlamp, since the room light will be off
- Masking tape and a pen to label wires
- Phone camera
Step 1: Turn off power at the breaker
Find the breaker for the switch's circuit. If your panel is labeled, switch that breaker OFF. If it isn't, turn the light on, then switch breakers off one at a time until it goes out. Put a piece of tape over the breaker and a note on the panel so nobody turns it back on while you work.
Remember that a single switch box can contain wires from more than one circuit. That is why the next step matters.
Step 2: Verify the power is off
Test your non-contact voltage tester on a known live outlet first to make sure it works. Then remove the switch's cover plate (usually two small screws) and hold the tester near each wire in the box, not just the switch. Test the tester again on the live outlet afterward. If the tester beeps on anything in the box, stop. Find the right breaker before going further.
Non-contact testers are a quick check, not a guarantee. If you own a multimeter and know how to use it safely, a contact test gives more certainty.
Step 3: Remove the switch and photograph the wiring
Unscrew the two long mounting screws at the top and bottom of the switch strap and gently pull the switch straight out of the box. Don't yank; wires can be short.
Take a clear photo before disconnecting anything. On a typical single-pole switch you'll see:
- Two wires on the brass screws. These are usually black (or one black and one red). One brings power in; the other goes to the light.
- A bare copper or green wire on the green ground screw, if your box has a ground.
- White neutral wires bundled together with a wire connector in the back of the box. These normally do not connect to a standard switch. Leave them alone.
If you see a white wire on a brass screw, two wires under one screw, wires pushed into back holes, or anything you can't identify, stop here and consider calling an electrician.
Step 4: Check the condition of the wires
Look at each conductor. The copper should be bright or lightly tarnished, not blackened. Insulation should be intact up to where it was stripped. If a wire end is nicked or broken, you can cut it back and strip about 3/4 inch of insulation, but only if there is enough length left in the box. If the wire is too short to work with safely, call an electrician; extending it correctly takes the right materials.
Step 5: Disconnect the old switch
Loosen the terminal screws and unhook the wires. If the wires were pushed into back-wire holes, many switches have a small release slot; insert a small screwdriver to free them, or cut the wire at the switch and re-strip it if there's enough length.
Step 6: Connect the new switch
- Ground first. Attach the bare or green ground wire to the green screw on the new switch.
- Brass terminals. Form a clockwise hook in the end of each black (or black/red) wire with needle-nose pliers. Place each hook around a brass screw so tightening the screw closes the loop, then tighten firmly. On a standard single-pole switch either wire can go on either brass screw.
- Check for loose strands or bare copper sticking out past the screw head. Insulation should come close to the terminal without being pinched under it.
If your new switch came with an instruction sheet that differs from this, follow the manufacturer's instructions.
Step 7: Fold the wires and mount the switch
Fold the wires neatly back into the box in an accordion shape and push the switch in straight. Make sure "ON" reads right-side up for a toggle switch. Tighten the mounting screws until the switch is snug and level, but don't overtighten and crack the strap. Install the cover plate. The NFPA's electrical safety checklist notes that all outlets and switches should have faceplates.
Step 8: Restore power and test
Remove your tape from the breaker and switch it back ON. Flip the switch several times. The light should come on and go off cleanly, with no buzzing, flicker or warmth at the plate.
If the breaker trips immediately, the light doesn't work, or the switch gets warm, turn the breaker off again and call a licensed electrician. Don't keep resetting a breaker that trips.
Common mistakes to avoid
- Trusting the switch position instead of the breaker. Turning the switch off does not make the wires in the box safe.
- Assuming one breaker kills the whole box. Test every wire.
- Over-stuffing the box. Crushed wires can damage insulation.
- Wrapping wires counterclockwise. The loop can work loose as you tighten.
- Mixing up switch types. A 3-way switch has three terminals plus ground; it won't behave like a single-pole switch.
- Replacing a damaged switch without asking why. A scorched or melted switch points to a bigger problem.
When to call a licensed electrician
Call a professional if any of these apply:
- Your jurisdiction requires a permit or licensed electrician for the work, or you rent your home.
- You find aluminum wiring, cloth-insulated wiring, or no ground where one is expected and you're unsure what that means.
- There are scorch marks, melted plastic, a burning smell, or the old switch was hot.
- The light flickers or dims elsewhere in the house, or breakers trip frequently. NFPA lists these among warning signs that call for a qualified electrician.
- You want to install a dimmer or smart switch and there's no neutral in the box, or the instructions don't match what you see.
Quick recap
Turn the breaker off, verify with a tester, photograph the wiring, and swap like for like: ground to green, the two hot wires to the brass screws, neutrals left alone. If anything looks unusual, stop. A worn switch is a small job; a hidden wiring problem is not.
Related guides
- GFCI Outlet Won't Reset? Safe Troubleshooting Steps
- Breaker Keeps Tripping? Safe Homeowner Checks
- Outlet Not Working? Safe Checks Before You Call an Electrician
Sources and further reading
- NFPA: Electrical safety in the home
- NFPA: Electrical safety checklist (PDF)
- ESFI: Understanding your home electrical system
- U.S. Fire Administration: Appliance and electrical fire safety
- The instruction sheet packaged with your replacement switch
Sources checked October 23, 2026. If something here does not match your product's manual, follow the manual and let us know.
Frequently asked questions
How do I know if my switch is single-pole?
A single-pole switch controls a light from one location only and usually has ON and OFF printed on the toggle. It typically has two brass terminal screws plus a green ground screw. If the same light is controlled from two places, you have 3-way switches, which are wired differently.
Is it legal to replace a light switch myself?
It depends on where you live. Some states and cities allow homeowners to do like-for-like replacements in their own home; others require a permit or a licensed electrician, and renters usually need landlord approval. Check with your local building department before you start.
Does it matter which wire goes on which brass screw?
On a standard single-pole switch the two brass terminals are interchangeable. Smart switches, dimmers and switches with a neutral are different, so follow the instructions that come with the device.
Why is there a white wire connected to my switch?
In older 'switch loop' wiring, a white wire is sometimes used as a hot conductor and should be marked with black or red tape. Because this can be confusing and dangerous to misread, it is a good point to stop and ask a licensed electrician if you are unsure.
Should I use the push-in holes on the back of the switch?
Many electricians prefer the side screw terminals because they give a more secure connection. If your switch allows back-wiring, follow the manufacturer's instructions for wire gauge and type exactly.