How to Winterize Outdoor Faucets and Hose Bibs
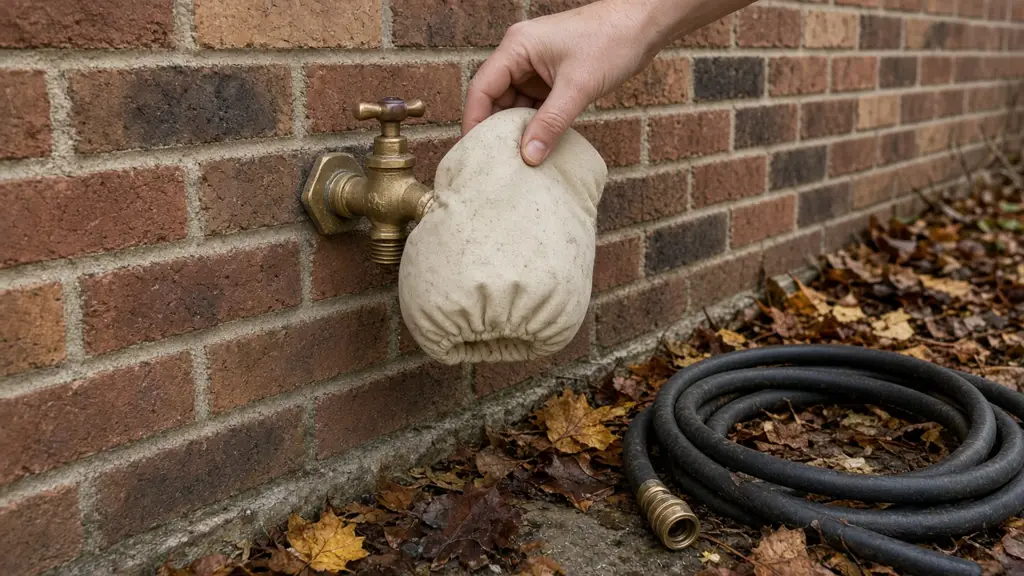
Water expands when it freezes. In an outdoor faucet (also called a hose bib, spigot or sillcock) that expansion can split the valve or the pipe behind it. Often the damage doesn't show until spring, when you turn the faucet on and water sprays inside a wall or basement.
Winterizing takes about 15 to 30 minutes per faucet and costs little more than a faucet cover. Do it before your area's first hard freeze.
Identify your faucet type
- Standard hose bib: A short faucet with its valve right at the outside wall. Many have a separate shutoff valve indoors on the pipe that feeds them.
- Frost-free sillcock: Looks similar outside, but has a long stem so the actual valve sits 6 to 12 inches or more inside the heated part of the house. You usually can't see an indoor shutoff on a short frost-free run, though one is often present further back.
If you're not sure, look at the pipe inside the wall where the faucet is. A frost-free model has a long body extending into the house.
Tools and materials
- Flashlight
- Bucket and towels
- Insulated faucet cover (foam dome or fabric cover)
- Optional: pipe insulation sleeves for exposed pipes in unheated spaces
- Optional: adjustable wrench if a shutoff valve handle is stiff
Step 1: Disconnect and drain hoses
Unscrew every hose, splitter and timer from outdoor faucets. A connected hose traps water in the faucet, which defeats even a frost-free design.
Drain the hoses, coil them and store them somewhere they won't freeze and crack, such as a garage or shed.
Step 2: Shut off the indoor valve
Find the shutoff valve for each outdoor faucet. Look on the pipe running toward that wall in the basement, crawl space, utility room or behind an access panel.
- Turn the valve clockwise to close it, or turn a lever handle so it sits perpendicular to the pipe.
- If the valve has a small cap on the side (a drain or bleeder cap), place a bucket under it.
If a valve is seized, don't force it with a long wrench. Old valves can break. A plumber can replace it with a quarter-turn ball valve.
Step 3: Drain the line
- Go outside and open the outdoor faucet fully. Water left in the pipe will run out.
- Back inside, if the shutoff has a bleeder cap, unscrew it slowly over the bucket to let the rest drain and to let air in. Replace the cap once dripping stops.
- Leave the outdoor faucet open for the winter so any water left has room to expand.
Step 4: For frost-free sillcocks
If you have no separate indoor shutoff for a frost-free sillcock:
- Make sure the hose is disconnected.
- Open the faucet briefly to let the stem drain, then close it.
- Check that the faucet body slopes slightly down toward the outside. Installation instructions from sillcock makers call for this slope so water drains out. If yours slopes back toward the house, have a plumber correct it.
Step 5: Add a cover
Fit an insulated faucet cover over each outdoor faucet. It slows heat loss from the wall and protects against wind. Make sure the cover's strap or seal sits tight against the siding.
Step 6: Protect nearby exposed pipes
While you're in the basement or crawl space, look for water pipes near exterior walls or in unheated areas. Foam pipe insulation sleeves are an inexpensive way to slow freezing. The Red Cross also recommends keeping garage doors closed when water lines run through the garage and letting faucets drip during extreme cold.
In spring
- Close the outdoor faucet.
- Open the indoor shutoff slowly.
- Open the outdoor faucet and watch the flow. Then check inside: look and listen for leaks near the wall where the pipe passes through.
Signs the faucet froze or burst
- Water leaks inside the wall, ceiling or basement when you use the outdoor faucet
- Weak or no flow from the outdoor faucet, or water spraying from the handle area
- Damp drywall or a water stain near where the faucet passes through the wall
If you see any of these, shut off the indoor valve (or the main water shutoff) right away and call a plumber.
Related guides
- Fall Home Maintenance Checklist: 15 Tasks Before Winter
- How to Change a Furnace Filter
- How to Fix Low Water Pressure in a Faucet
Sources and further reading
- American Red Cross: How to prevent and thaw frozen pipes
- Ready.gov: Winter weather
- Your sillcock manufacturer's installation instructions (slope, hose disconnection and anti-siphon guidance)
Sources checked October 23, 2026. If something here does not match your product's manual, follow the manual and let us know.
Frequently asked questions
Do frost-free faucets still need winterizing?
Yes, partly. A frost-free sillcock keeps its valve inside the heated wall, but it only drains if the hose is disconnected and the faucet is installed with a slight downward slope. Leave a hose attached and the water in the stem can freeze and split it.
When should I winterize outdoor faucets?
Before the first hard freeze in your area. Many people do it in mid to late fall along with other cold-weather prep. Check your local forecast; there's no single date for the whole US.
Should I leave the outdoor faucet open or closed after draining?
On a faucet with an indoor shutoff, leave the outdoor faucet open after shutting the indoor valve and draining, so any remaining water has room to expand. Close it again in spring before turning the indoor valve back on.
Are foam faucet covers enough on their own?
They help, but a cover is not a substitute for disconnecting the hose and draining the line. Think of it as an extra layer.