How to Fix a Leaking P-Trap Under the Sink
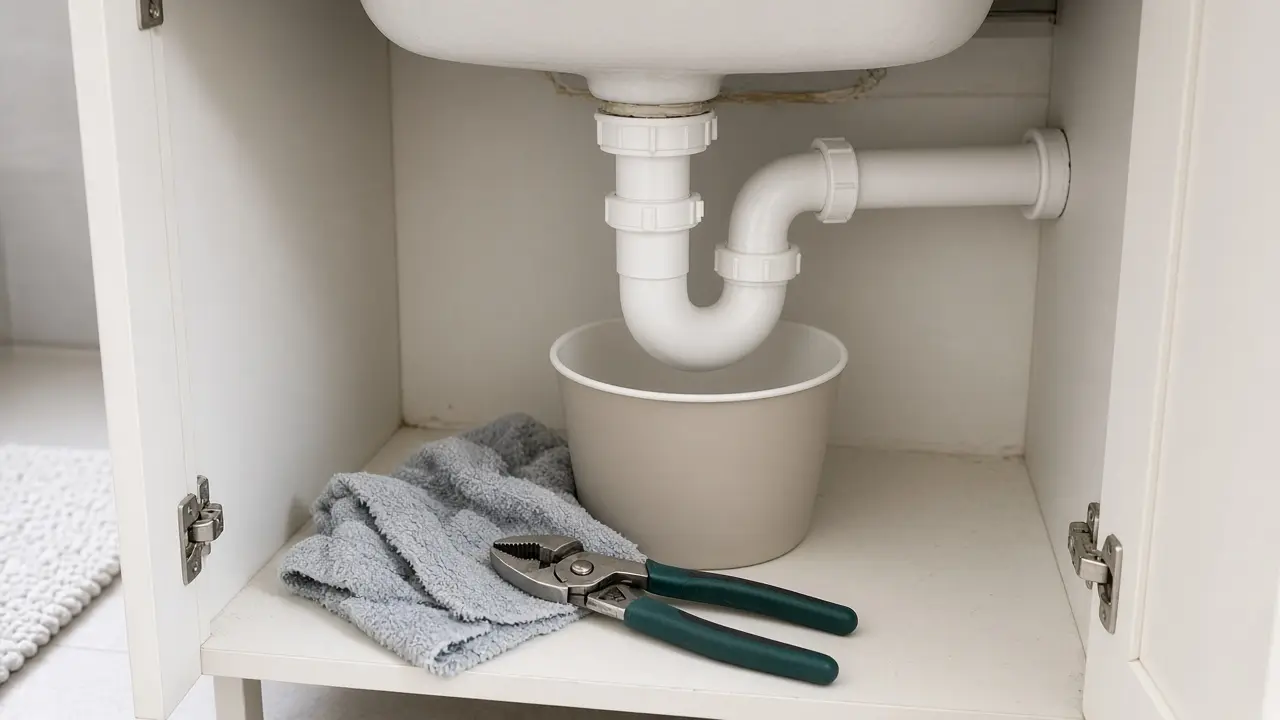
A puddle in the sink cabinet is annoying, and a slow drip under the sink can quietly damage the cabinet floor. The good news is that leaks on the curved drain pipe, called the P-trap, are among the easiest plumbing repairs to do yourself. Most come down to a loose nut, a shifted washer, or a cracked piece of trap. This guide shows you how to find exactly where the water is coming from, fix the slip joints properly, and know when it's time to replace the trap or call a plumber.
Before you start: Clear out the cabinet, put a bucket under the trap, and have towels ready. The trap holds water, and it will spill when you open it. If you've recently poured a chemical drain cleaner down this sink, don't open the trap yet. That water may be caustic. Wear gloves and eye protection, or let a plumber handle it.
What a P-trap is and why it leaks
A P-trap is the U-shaped section of drainpipe under a sink, plus the short arm that runs into the wall. The U bend holds a little water, which forms a seal that helps block sewer gas from coming up through the drain.
A typical trap has three slip joints, each made of a plastic or metal nut and a cone-shaped washer:
- Tailpiece to J-bend: where the straight pipe coming down from the sink enters the top of the U.
- J-bend to trap arm: where the U connects to the horizontal arm.
- Trap arm to wall: where the arm enters the drain fitting in the wall (some setups use a different connector here).
Slip joints seal because the nut squeezes the washer against the pipe. When the washer is missing, flattened, cracked, twisted, or installed the wrong way, or when the pipes are out of line, water gets past it.
Tools and supplies
- Bucket and old towels
- Flashlight
- Gloves and safety glasses
- Slip-joint or tongue-and-groove pliers (optional; most plastic nuts loosen by hand)
- Old toothbrush or rag for cleaning threads and pipe ends
- Replacement slip-joint washers in the right size, or a complete P-trap kit if parts are cracked or corroded
Know your size. Bathroom sinks usually use 1-1/4 inch drain parts, while kitchen sinks usually use 1-1/2 inch. Some kits include reducing washers so one trap fits either size. Take the old washer or trap to the store if you're not sure.
Step 1: Find exactly where it's leaking
Don't guess. A leak that drips off the bottom of the U often starts higher up.
- Dry every pipe and nut under the sink with a towel.
- Lay a dry paper towel or tissue on the cabinet floor under the trap.
- Run water into the sink for 30 to 60 seconds. Then fill the basin partway and pull the stopper, because some leaks only appear under the pressure of a full basin.
- Use the flashlight and run a dry tissue around each joint. The first spot that feels wet is your leak.
If the water is coming from somewhere else, this isn't a P-trap fix:
- Wet at the very top, right under the sink basin: the sink drain flange or its seal may be leaking.
- Wet on the thin supply lines or shut-off valves: that's the water supply side, not the drain. Close the shut-off valve and check the supply line connection, or call a plumber. If the drip comes from the faucet itself, see how to fix a leaky single-handle faucet.
- Wet where a dishwasher hose or garbage disposal connects: check those connections first.
Step 2: Try a gentle snug first
If a slip nut is simply loose, a small turn may stop the drip.
- Turn the nut by hand in the tightening direction until it's snug.
- If it still drips, add up to about a quarter turn with pliers.
- Run water again and recheck.
Go easy. Oatey's P-trap instructions say to tighten snugly by hand and firm up with pliers only if needed, and warn that overtightening can crack plastic fittings or strip threads. If the nut is already tight and it still leaks, stop tightening and move to Step 3.
Step 3: Take the leaking joint apart and reseat the washer
This fixes most P-trap leaks.
- Keep the bucket directly under the U bend.
- Unscrew the slip nut at the leaking joint (counterclockwise). If you're opening the J-bend, loosen both of its nuts and lower it carefully into the bucket. The water inside will pour out.
- Look at the washer. Is it there at all? Is it flattened, cracked, hard, or twisted? Is it sitting squarely against the fitting?
- Clean the pipe end, the inside of the fitting, and the nut threads. Remove any gunk, old tape, or debris that can stop the washer from seating.
- Check the washer's direction. The tapered side of a cone washer faces the fitting it seals into. In Oatey's guide, the nut goes onto the pipe first, followed by the washer with the tapered side facing the fitting. Some trap kits use a flat washer at the J-bend; follow your kit's diagram.
- Replace the washer if it's damaged or stiff. Washers are cheap, and an old one that has taken a set often won't reseal.
- Reassemble with the pipe pushed fully into the fitting. Hand-tighten the nut, then add only a little extra with pliers if needed.
- Run water and test as in Step 1.
Don't count on tape or sealant. A slip joint seals at the washer, not the threads. The manufacturer instructions listed below rely on a correctly seated washer and a snug nut, with no tape required.
Step 4: Fix misalignment
If the joint keeps leaking even with a good washer, the pipes may be forced out of line. A trap that has to be pulled sideways to meet the wall pipe will press the washer unevenly.
- Loosen all the slip nuts on the trap by a turn or two.
- Let the parts settle into a straight, natural line. The tailpiece should drop straight into the J-bend, and the trap arm should line up with the wall fitting without bending.
- Make sure each pipe goes far enough into its fitting. The Newport Brass P-trap kit instructions, for example, say to insert the wall bend tube at least 1/2 inch into the waste connection.
- If a pipe is too long or too short to line up, a pipe may need trimming or a different length part. Kit instructions often allow cutting the tailpiece or trap arm. Cut plastic pipe square and remove burrs. If you're not comfortable cutting, a plumber can do it quickly.
- Tighten each nut snugly once everything lines up, then test.
Kingston Brass's P-trap instructions give a good rule for any trap: if a leak appears and tightening doesn't correct it, loosen the nuts, check that the washers are installed properly, and retighten.
Step 5: Replace the trap if it's cracked or corroded
Replace the J-bend or the whole trap when you see:
- A crack in the plastic, often near a nut or along the bottom of the U
- Stripped threads on the nut or the trap
- A metal trap that is corroded, pitted, very thin, or has nuts seized in place
Oatey's guide notes that if metal fittings are severely corroded, replacement may be the safest option. To replace a trap:
- Buy a trap kit matched to your drain size (usually 1-1/4 inch for bathrooms and 1-1/2 inch for kitchens).
- Remove the old trap into the bucket.
- Dry-fit the new parts first to check alignment and length.
- Assemble with the nut first, then the washer, tapered side toward the fitting.
- Hand-tighten all nuts, align the trap, then snug them with no more than a small extra turn.
- Run water for 30 to 60 seconds and check every joint.
Step 6: Test it properly
A quick splash isn't enough. After any repair:
- Run the faucet for a minute or two.
- Fill the basin and drain it all at once.
- Check every joint with a dry tissue.
- Leave a dry paper towel under the trap overnight and check it in the morning.
Running water also refills the trap's water seal, which helps keep sewer odors out.
When to call a plumber
Call a licensed plumber if:
- The leak is coming from the wall fitting, or the pipe inside the wall looks damaged or corroded
- The sink drain flange or a drain connection behind the cabinet is leaking
- The pipes need cutting or re-routing and you're not comfortable doing it
- The trap was full of chemical drain cleaner and won't drain
- The cabinet floor is soft, swollen, or moldy, which can mean a long-term leak
- You fixed every joint and it still leaks
Common mistakes to avoid
- Overtightening plastic nuts. It's the fastest way to crack a trap.
- Reusing a flattened washer. If it's hard or misshapen, replace it.
- Installing the washer backwards. The tapered side faces the fitting.
- Forcing pipes into line. Fix the alignment instead of cranking the nut.
- Ignoring small drips. EPA WaterSense encourages households to find and fix leaks, and a slow drip under a sink can also soak the cabinet floor over time.
Quick recap
Find the exact joint that's wet, try a gentle snug, then take the joint apart, clean it, and reseat or replace the washer with the tapered side toward the fitting. Line up the pipes so nothing is under strain, tighten by hand plus a little, and test with a full basin. Replace a cracked or corroded trap, and call a plumber for leaks in the wall or under the sink basin.
Related guides
- How to Unclog a Kitchen Sink: Plunger, P-Trap and Snake Methods
- Garbage Disposal Humming But Not Working? How to Unjam It
- How to Fix Low Water Pressure in a Faucet by Cleaning the Aerator
Sources and further reading
- Oatey: How to install a P-trap
- Newport Brass: P-trap supply kit installation instructions (PDF)
- Kingston Brass: Decorative P-trap installation instructions (PDF)
- EPA WaterSense: Fix a Leak Week
Sources checked October 24, 2026. If something here does not match your product's manual, follow the manual and let us know.
Frequently asked questions
Why is my P-trap leaking at the nut?
Most leaks at a slip nut come from a washer that has shifted, flattened, or been installed facing the wrong way, from a nut that has worked loose, or from pipes that are pulled out of line so the washer can't seal evenly. Taking the joint apart, cleaning it, and reseating the washer usually fixes it.
Can I just tighten the P-trap nut harder?
Try a gentle snug first, but don't crank on it. Oatey's P-trap guide says to hand-tighten, then firm up slightly with pliers if needed, and warns that overtightening can crack plastic fittings or strip threads.
Do I need plumber's tape or pipe dope on slip nuts?
Not normally. A slip joint seals with the compression washer, not the threads. The manufacturer instructions referenced in this guide rely on a correctly seated washer and a snug nut. Follow your own kit's instructions if they say otherwise.
Why is there water in the P-trap at all?
The U-shaped bend is designed to hold a small amount of water. That water seal helps keep sewer gases from coming up through the drain, which is why you should run water after any repair to refill it.
Should I replace a metal P-trap that leaks?
If a metal trap is corroded through, pitted, or the nuts are seized, replacement is usually the practical fix. Oatey notes that severely corroded parts may be safest to replace. A plastic trap kit is inexpensive and widely available, but match the pipe diameter to your drain.