How to Fix a Wobbly Toilet: Tighten the Bolts, Shim It or Reset the Seal
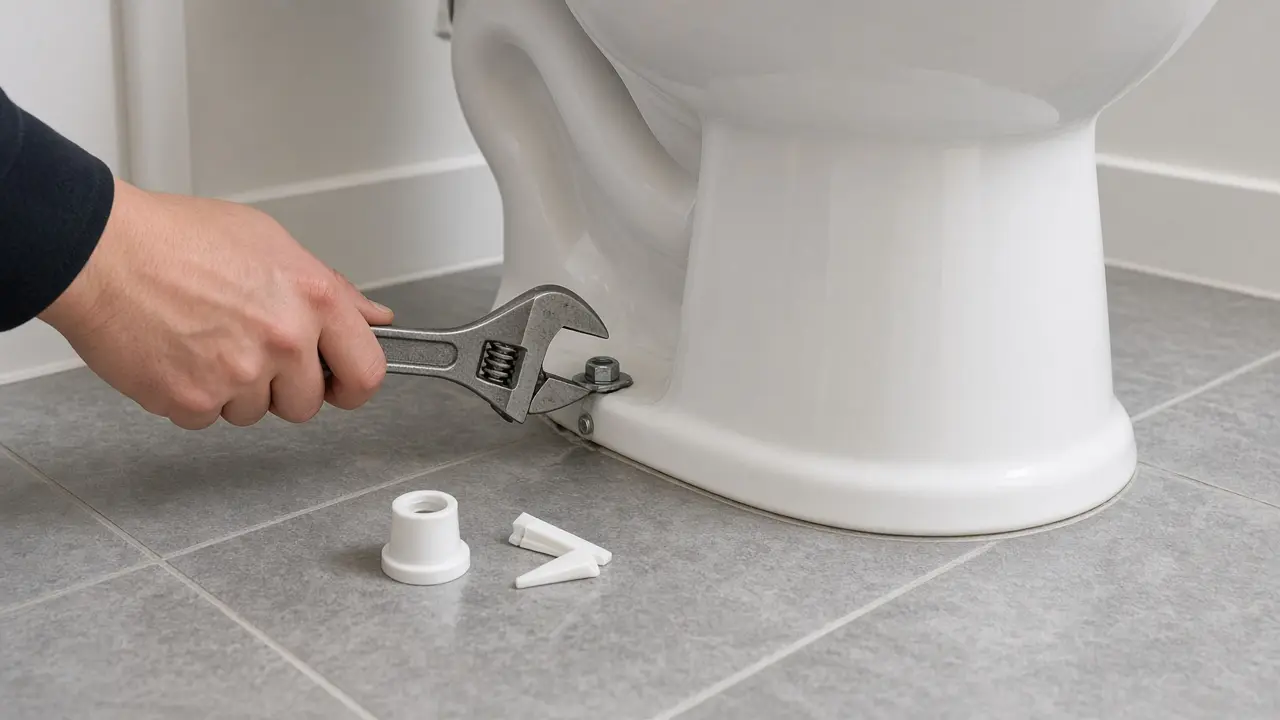
A toilet that shifts or rocks when you sit on it is more than an annoyance. Every rock flexes the seal between the toilet and the drain, and once that seal breaks, water can leak under the toilet and into the subfloor. The good news is that most wobbly toilets are fixed in a few minutes with a wrench or a couple of plastic shims. This guide walks through the fixes in order, from the quickest to the most involved, and explains when to stop and call a plumber.
Why toilets wobble
There are four usual causes, and they are worth checking in this order:
- Loose closet bolts. Two bolts (also called floor bolts or T-bolts) come up through the flange in the floor and through the toilet's base, held by nuts under the plastic caps on each side. These nuts can work loose over time.
- An uneven floor. Tile, vinyl and concrete floors are rarely perfectly flat. American Standard notes that its bowls have a built-in tolerance of up to 1/8 inch for different floor types, and that a bowl may not sit completely flat. TOTO's installation manual also says rocking may occur depending on the condition of the flooring.
- A wax ring that wasn't fully compressed or has broken. American Standard's troubleshooting chart lists a wax ring that isn't fully compressed as one cause of a toilet that rocks after installation.
- A broken or loose flange, or a damaged floor. If the bolt slots in the flange are cracked or the flange isn't fastened to the floor, the toilet will keep rocking no matter how much you tighten the nuts. Soft or rotted subflooring causes the same problem.
Tools and materials
- Flat-blade screwdriver or putty knife (to pop off the bolt caps)
- Adjustable wrench or a small socket set
- Plastic or composite toilet shims
- Utility knife
- A small level (optional, helpful for finding the low side)
- Old towels and a flashlight
If you end up removing the toilet, you'll also need a new wax ring or wax-free seal, new closet bolts, a bucket and sponge, rags, and a helper. Toilets are heavy and awkward to lift.
Fix 1: Snug the closet bolts
This is always the first thing to try.
- Pop off the bolt caps. Pry the plastic caps at each side of the base up with a flat screwdriver or putty knife.
- Check the nuts. If one turns easily by hand, it has worked loose.
- Tighten a little at a time, alternating sides. Give one nut a small turn with the wrench (about a quarter turn), then the other. Rock the toilet gently after each pair of turns.
- Stop as soon as the toilet stops moving. That's the key rule. Kohler, American Standard and TOTO all warn in their installation instructions that overtightening can break or chip the vitreous china. Fluidmaster's instructions for its bolts say to tighten until snug, then add about a quarter turn with a wrench, and not to force a rocking toilet down by overtightening.
- Replace the caps and flush a few times, checking the base for water.
If the bolt spins along with the nut, hold the bolt with locking pliers while you turn the nut. If the nut never gets tight at all, the bolt may be stripped or the flange slot underneath may be broken. That points to Fix 3.
Don't crank on the nuts to stop a rock. If the bolts are snug and the toilet still moves, the base is bridging a low spot in the floor. Turning the nuts harder only pulls the china toward empty space, and that's how bases crack. Shim instead.
Fix 2: Shim an uneven floor
If the bolts are snug and the toilet still rocks, the floor isn't flat under the base.
- Find the gap. Rock the toilet gently and watch where the base lifts off the floor. A small level laid across the bowl rim can help you see which way it leans.
- Cut any caulk around the base with a utility knife so you can slide shims in.
- Slide shims in by hand under the low side until the rocking stops. Fluidmaster's instructions warn not to use tools or force the shims in, because that can lift the toilet and create a gap that shouldn't be there. Check that the toilet is now solid from every side.
- Re-check the nuts. They may have loosened slightly. Snug them again, still without overtightening.
- Trim the shims flush with the base using a utility knife.
Use plastic or composite shims made for toilets. This Old House advises against wood shims or anything that can rot, because the floor around a toilet inevitably gets wet.
How big a gap can shims handle? Fluidmaster suggests shims when the toilet is raised off the floor by 3/16 inch or less. For a gap of 1/4 inch or more, it suggests building up the floor around the flange (for example with a toilet base plate) so the bowl can sit flat.
Family Handyman points out that an old wax ring can crack if you shim a toilet too high, so watch the base for leaks over the next few weeks.
Should you caulk the base?
Manufacturers don't agree. American Standard suggests a bead of caulk around the front of the base for extra stability. Korky does not recommend caulking around the base, because caulk can hide a leak until it has damaged the floor. A sensible middle path: wait until you're sure the seal isn't leaking, caulk only if you want to, and leave a gap at the back so water from any future leak has somewhere to show. Never use caulk to cover a leak.
Fix 3: Remove the toilet and reset it on a new seal
If the toilet still rocks after Fixes 1 and 2, water appears around the base, or you smell sewage near the toilet, the seal or flange needs attention and the toilet has to come up. A wax ring can't be reused: Kohler's installation guides say that if the watertight seal is broken you must install a new wax seal. Have a new ring (or a wax-free seal) and new closet bolts ready before you start.
- Shut off the water at the valve behind the toilet. Flush and hold the handle down to drain the tank, then sponge out the water left in the tank and bowl.
- Disconnect the supply line from the bottom of the tank. Keep a towel under it.
- Remove the nuts. If they're rusted solid, you may need to cut the bolts with a small hacksaw, protecting the china from the blade.
- Lift the toilet straight up with a helper and set it on old towels or cardboard. Korky suggests removing the tank from the bowl first if you're working alone.
- Plug the drain with a rag to block sewer gas and stop anything falling in.
- Scrape off the old wax from the flange and the toilet's outlet horn with a putty knife.
- Inspect the flange and floor.
- Flange solid, bolt slots fine: clean the floor and look for chunks of grout, caulk or old wax that could make the toilet rock.
- Bolt slots broken but the flange is otherwise sound: Family Handyman recommends a flange repair ring that matches your flange style.
- Flange cracked: Korky says a cracked flange must be replaced, and it doesn't recommend sealants as a fix.
- Flange loose: This Old House stresses that the flange should be fastened to the subfloor with rust-resistant screws, or the toilet will keep rocking regardless of the bolts.
- Dry-fit the toilet. Korky recommends setting the toilet on the flange without a seal first to make sure it sits flat, and shimming if the floor isn't level.
- Install new bolts in the flange slots, heads down and threads up, as TOTO's manual describes.
- Fit the new seal. For a wax ring, TOTO's manual has you press it firmly onto the outlet horn on the underside of the toilet. For a wax-free seal, follow its own instructions. Fluidmaster and Korky both use spacers or extra rings depending on how high the flange sits relative to the finished floor.
- Lower the toilet straight down over the bolts, then press down firmly on both sides of the rim to compress the seal. TOTO cautions not to move the bowl after the wax ring is set, and Kohler warns not to lift or rock the bowl after placement.
- Add washers and nuts and tighten alternately until the toilet is snug and stable, the same gentle way as in Fix 1. Shim if needed.
- Trim long bolts with a hacksaw if the caps won't fit, then snap the caps on.
- Reconnect the water, let the tank fill, and flush several times while you check the base and supply connection for leaks.
One advantage of wax-free seals: Fluidmaster and Korky both say their wax-free seals can be repositioned, while a wax ring is ruined if the toilet isn't set correctly the first time.
Safety notes
- Protect your back. A two-piece toilet is heavy and awkward. Get a helper or take the tank off first.
- Protect the china. Porcelain cracks without warning. A crack at a bolt hole means the toilet bowl needs replacing; sealant won't fix cracked china.
- Keep sewer gas out. Leave a rag in the drain whenever the toilet is off, and remove it before you set the toilet back down.
- Clean up properly. Wear gloves when handling the old wax ring and wash your hands afterward.
When to call a plumber
Call a licensed plumber if:
- The flange is cracked, corroded or badly broken, or the drain pipe below it moves.
- The floor around the toilet feels soft or spongy, or you see stains, sagging or water damage on the ceiling below. That suggests a long-term leak and possible rot, which Family Handyman says is better left to a pro.
- The toilet still leaks at the base after you've reset it on a new seal.
- You have a cast-iron drain, an unusual offset flange, or a wall-hung toilet.
- You're not comfortable lifting the toilet or working with the drain open.
If you rent, tell your landlord before removing a toilet. Repairs to plumbing fixtures are often the landlord's responsibility.
Related guides
- How to Fix a Running Toilet: Flapper vs. Fill Valve
- Toilet Keeps Clogging? Causes and Fixes That Actually Last
- How to Shut Off Water to Your House (Find and Use the Main Valve)
Sources and further reading
- American Standard: My toilet bowl doesn't sit completely flat on the floor and rocks slightly. Is this normal?
- TOTO: Toilet installation manual (CST775/CST776/CST785/CST786)
- Fluidmaster: 7530 Better Than Wax wax-free toilet seal (FAQ on shims and base plates)
- Fluidmaster: Toilet installation kit quick install guide (PDF)
- Korky: How to Fix a Wobbling Toilet
- Family Handyman: How to Fix a Wobbly Toilet
- This Old House: How to Fix a Wobbly Toilet
- This Old House: How to Repair a Cast-Iron Toilet Flange
Sources checked 2026-11-15. Toilet designs, seals and bolts vary by manufacturer. Always follow the instructions that came with your toilet and parts, and let us know if something here no longer matches.
Frequently asked questions
Can I just tighten the bolts on a wobbly toilet?
Often, yes, if the nuts have worked loose. Tighten them a little at a time, alternating sides, and stop as soon as the toilet stops moving. If the bolts are already snug and it still rocks, the floor is uneven, so shim the base instead of turning the nuts further. Overtightening can crack the porcelain.
How tight should toilet bolts be?
Snug, not tight. No major manufacturer publishes a torque figure. Fluidmaster's instructions say to tighten until snug and then add about a quarter turn with a wrench, and Kohler, American Standard and TOTO all warn that overtightening can damage the china. Follow the instructions that came with your toilet or bolts.
Is a wobbly toilet an emergency?
Not usually, but don't ignore it. A toilet that rocks every time someone sits on it can break the wax seal, and a broken seal can let water and sewer gas escape under the toilet. If you see water at the base or smell sewage, fix it promptly.
What kind of shims should I use under a toilet?
Use plastic or composite toilet shims made for the job. This Old House advises against wood shims or anything that can rot, because the floor around a toilet gets wet. Slide them in by hand until the rocking stops, then trim the ends flush.
Do I need a new wax ring if I remove the toilet?
Yes. Kohler's installation guides say that if the watertight seal is broken you must install a new wax seal, and a wax ring can't be reused once it has been compressed. Buy a new ring, and new closet bolts, before you lift the toilet.
Should I caulk around the base of the toilet?
Manufacturers disagree. American Standard suggests a bead of caulk around the front of the base for extra stability, while Korky does not recommend caulking the base because it can hide a leak. If you caulk, wait until you're sure the seal isn't leaking and leave a gap at the back so any leak can show.