How to Install Weatherstripping on an Exterior Door (Step by Step)
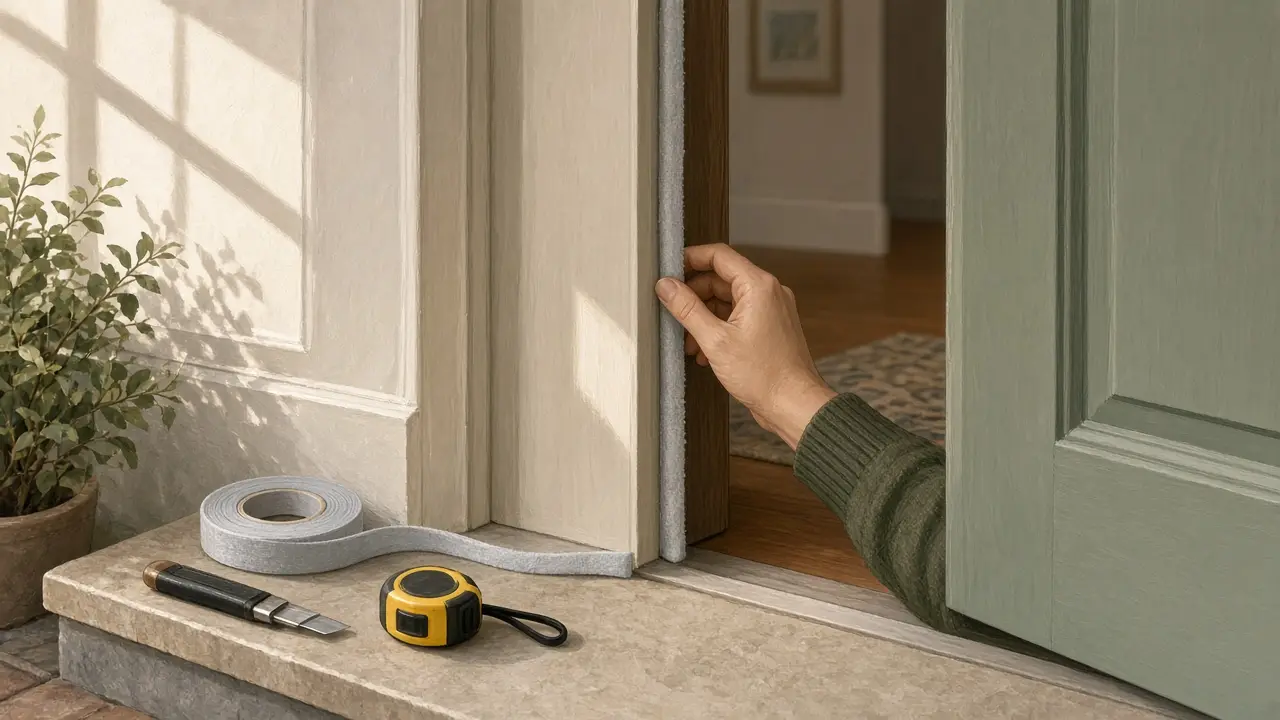
A drafty exterior door makes the rooms near it feel cold, lets in dust, bugs and noise, and makes your heating and cooling work harder. In most cases the fix is new weatherstripping: a flexible seal around the door jamb that the door presses against when it closes, plus a sweep or threshold seal at the bottom. It's one of the cheapest and easiest air-sealing jobs in a house.
This guide follows U.S. Department of Energy (DOE) weatherization guidance and the Building America Solution Center, a DOE-funded resource run by Pacific Northwest National Laboratory. Always follow the instructions that come with the product you buy, since installation details vary by brand.
Step 1: Find where air is getting in
Before you buy anything, confirm the door is actually leaking and find where.
- Look for light. At night, turn on the porch light, switch off the lights in the room by the door, and look around the edges. Any light you see is a gap where outside air can also come in.
- Try the dollar-bill test. Close the door on a bill at several spots along the sides and top. If it slides out easily, the seal isn't making good contact there.
- Feel for drafts. On a windy or cold day, move your hand (or a tissue) slowly around the frame. The Building America Solution Center suggests closing all windows and exterior doors and turning on bathroom and kitchen exhaust fans first, which pulls outside air in through leaks and makes them easier to notice.
- Inspect the old seal. Look for torn, flattened, brittle or missing sections, especially near the latch side and the bottom corners.
Step 2: Fix a loose door first
DOE's weatherization job aid for exterior doors lists visible daylight and loose-fitting doors as common signs of air leakage, and says to make adjustments such as tightening loose hinges, knobs and strike plates before you weatherstrip. If the door sags or rattles, new seals won't make good contact.
- Tighten every hinge screw. If a screw just spins, it has stripped its hole.
- Check that the latch catches cleanly in the strike plate. If it doesn't, see our guide to fixing a door that won't latch.
- If the door rubs or sticks, deal with that first. The same hinge checks in our sticking door guide apply to exterior doors.
Step 3: Choose the right weatherstripping
Look closely at the jamb (the frame the door closes against).
- Kerf-mounted gasket: Many newer doors have a thin slot cut into the jamb with a foam or vinyl seal pushed into it. Pull out a short piece of the old seal and take it to the store, or note the door maker, so you can buy a matching replacement. This is usually the cleanest option.
- Screw-on or nail-on strips: For older doors with no kerf, vinyl or foam gaskets attached to a rigid wood, metal or plastic strip are fastened to the door stop. They take a little more work but last longer than tape.
- Tension seal (V-strip): A vinyl or metal strip folded into a V that springs open to fill the gap. DOE guidance describes it as durable and nearly invisible, but notes that vinyl needs flat, smooth surfaces and that it can make a door a little harder to open and close.
- Foam tape: Self-adhesive closed-cell foam or EPDM rubber tape is the easiest to install and inexpensive, but durability is not especially high, so it suits spots with little wear.
- Felt: Cheap and easy, but DOE lists it as the least effective at stopping airflow and says not to use it where it's exposed to moisture or friction. Skip it on a busy exterior door.
For the bottom of the door, you'll need one of these:
- Door sweep: A strip of aluminum or stainless steel with a brush, vinyl or sponge edge. It mounts on the inside face of an in-swinging door, or the outside face of an out-swinging door.
- Door shoe: An aluminum channel with a vinyl insert that wraps the bottom of the door and sheds rain.
- Bulb threshold: A threshold with a built-in vinyl seal that the door bottom presses against.
What you'll need
- Tape measure and pencil
- Your chosen weatherstripping for the top and both sides
- A door sweep or bottom seal, if the bottom leaks
- Utility knife or sharp scissors (a hacksaw for metal-backed strips)
- Screwdriver or drill, and the screws supplied with the product
- Mild dish soap, water and a rag
- Optional: putty knife or scraper to remove old adhesive, and exterior caulk
Step 4: Remove the old seal and clean the surface
- Pull out kerf-mounted seals by hand, unscrew screw-on strips, and peel off old tape.
- Scrape off leftover adhesive gently so you don't gouge the wood or paint.
- Wash the surfaces with dish soap and water, as the Building America guide recommends, and let them dry completely. Adhesive won't hold on dirty or damp surfaces.
DOE also advises applying weatherstripping in temperatures above 20°F (-7°C). Check the package, since many adhesive products specify a warmer minimum.
Step 5: Measure twice and cut
- Measure the top of the jamb and each side separately. Doors are rarely perfectly square.
- DOE guidance says to measure twice before you cut anything, and to apply one continuous strip along each side rather than piecing short bits together.
- If the side pieces don't come pre-notched, DOE's job aid says to notch their ends so they fit tightly against the top piece. Gaps at the top corners are a common source of leftover drafts.
Step 6: Install the strips
Kerf-mounted gasket: Start at a top corner and press the fin into the slot with your thumb or a plastic putty knife, working down each side. Don't stretch the gasket as you go; stretched seals shrink back and leave gaps at the ends.
Screw-on strips: Hold the strip against the door stop with the door closed so the seal just touches the door face. DOE's exterior-door job aid describes running a thin bead of caulk along the back of the strip, in line with the screw holes, then fitting the strip snugly in place and fastening it with the short screws the manufacturer provides.
Tension seal or foam tape: Peel the backing a few inches at a time and press the strip firmly in place as you go. Put foam tape on the door stop where the face of the door will compress it, not on the edge that the latch slides past.
Whatever type you use, DOE says the material should compress when the door is shut, and it should be thick enough to press tightly between the door and the jamb without making the door difficult to close.
Step 7: Add or replace the door sweep
- Remove any old sweep by unscrewing it, prying it out of its slot, or peeling it off. The Building America guide suggests warming stubborn adhesive with a hair dryer.
- Measure the width of the door bottom and cut the sweep to match with a hacksaw (metal) or utility knife (vinyl).
- Close the door and hold the sweep so its seal lightly touches the threshold. Mark the screw holes, drill small pilot holes, and attach it.
- Open and close the door several times. The sweep should seal without dragging hard on the threshold or a rug.
Make sure the sweep you buy fits the thickness of your door. If the bottom gap is uneven, a sweep with slotted screw holes lets you adjust the height.
Step 8: Test your work
- Open and close the door several times. It should latch without slamming or pushing.
- Repeat the light test and dollar-bill test. The bill should now have some drag everywhere.
- Check the latch side and the corners again, since those are the spots most often missed.
If the door now won't latch, the seal is too thick or set too far out. Move it back slightly or switch to a thinner profile.
Safety notes
- Wear eye protection when cutting metal strips with a hacksaw, and file off sharp burrs.
- Use a sturdy step stool for the top of the jamb rather than standing on a chair.
- The door between your house and an attached garage deserves extra attention. The Building America Solution Center points out that weatherstripping it helps keep garage fumes out of the house. Don't remove or disable a self-closing hinge on that door if it has one.
- Renters should ask the landlord before replacing exterior door hardware or seals.
When to call a pro
Weatherstripping is a beginner-friendly job. Call a carpenter or door installer if:
- The door is warped, the frame is out of square, or there's rot in the jamb, threshold or door bottom.
- You feel strong cold air around the frame even with good seals. The Building America guide notes the rough opening behind the trim may not be insulated or air-sealed, which means removing trim.
- The threshold needs replacing or the door bottom needs trimming to fit a new shoe.
- Daylight shows through cracked glass or a damaged door panel.
Related guides
- Door Won't Latch? How to Fix Strike Plate Misalignment
- How to Fix a Sticking Interior Door
- Fall Home Maintenance Checklist: 15 Tasks Before Winter
Sources and further reading
- U.S. Department of Energy: Install Weatherstripping on an Exterior Door (job aid, PDF)
- Building America Solution Center: Add Weatherstrip to Windows and Doors
- Building America Solution Center: Install or Replace Door Sweeps
- U.S. Department of Energy: Guide to Air Sealing (PDF)
- ENERGY STAR: Seal and Insulate
Sources checked November 2, 2026. If something here does not match your product's instructions, follow the manufacturer and let us know.
Frequently asked questions
How do I know if my door needs new weatherstripping?
Look for daylight around the edges with the door closed, feel for drafts with your hand, or close the door on a dollar bill. The Building America Solution Center, a U.S. Department of Energy resource, says that if you can easily pull the bill out, air is probably leaking around the door. Torn, flattened, cracked or missing seals are also a clear sign.
What type of weatherstripping is best for an exterior door?
It depends on the door. Many newer doors have a slot (kerf) in the jamb that takes a push-in vinyl or foam gasket, so the best choice is a matching replacement. Older doors without a kerf can use screw-on vinyl or metal-backed strips, V-shaped tension seals, or foam tape. Energy Department guidance rates felt and open-cell foam as low in durability, so they're better for low-wear spots than for a busy front door.
Should weatherstripping make the door hard to close?
No. The seal should compress when the door shuts, but the door should still close and latch without forcing it. If you have to push hard, the strip is too thick or set too far out. Reposition it or switch to a thinner profile.
Can I install weatherstripping in cold weather?
Energy Department guidance says to apply weatherstripping to clean, dry surfaces in temperatures above 20°F (-7°C). Adhesive-backed products often list their own minimum temperature, so check the package. On a cold day, it can help to keep the strip indoors until you're ready to install it.
Do I need weatherstripping at the bottom of the door too?
Usually yes. The jamb strips seal the top and both sides, while the gap at the bottom is sealed by a door sweep, a door shoe or a bulb-type threshold. A sweep goes on the inside face of an in-swinging door and the outside face of an out-swinging door.