How to Caulk Windows from the Outside (Step by Step)
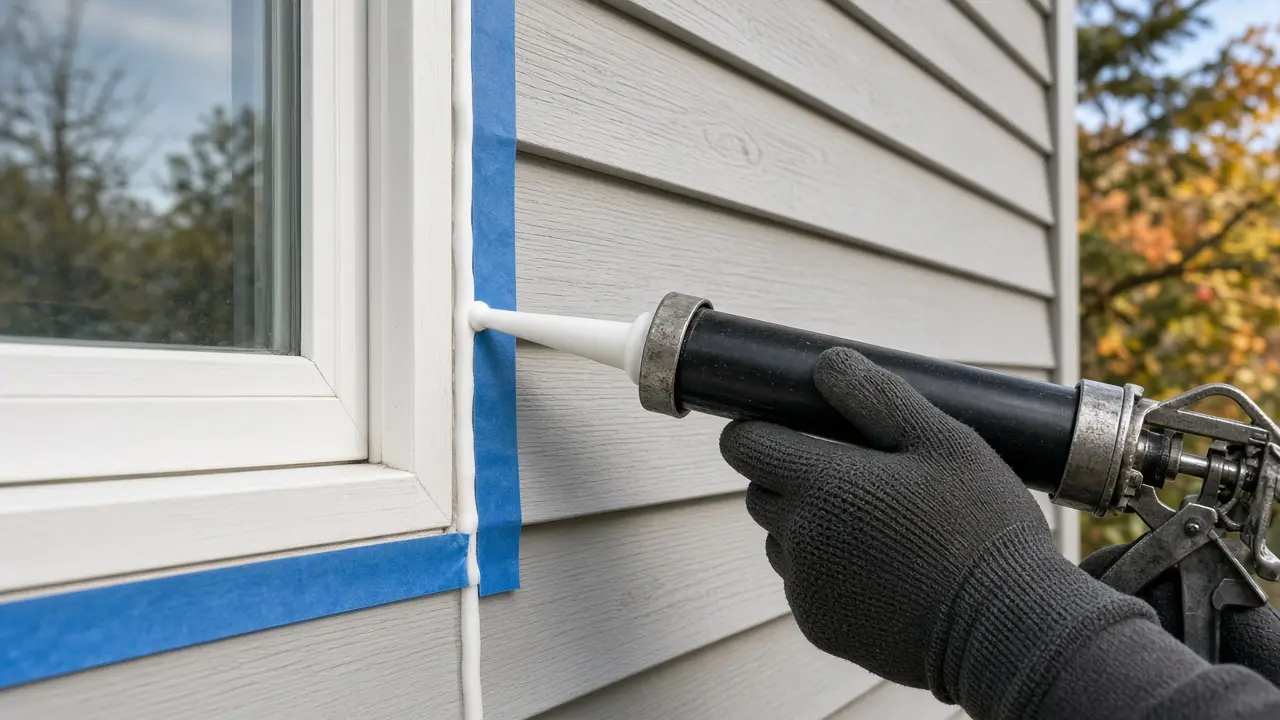
Old exterior caulk around windows dries out, cracks, and pulls away from the siding over time. When that happens, rain can get into the wall and drafts can get into the house. The Building America Solution Center, a U.S. Department of Energy resource run by Pacific Northwest National Laboratory, says replacing cracked or missing exterior caulk helps stop water leaks, reduces air leaks that cause drafts and heat loss, and can even help keep bugs out.
This guide walks through recaulking the joint between a window frame and the siding or trim on the outside of your house. It follows the Building America Solution Center's caulking guide, the U.S. Department of Energy's consumer guide to air sealing, the NFRC consumer guide to caulking and weatherstripping windows, and EPA's lead-safety advice for older homes. Always follow the directions on your caulk tube; they override general advice.
Caulk or weatherstripping: which one do you need?
The Department of Energy draws a simple line: caulk is for cracks and openings between parts that do not move, such as where a window frame meets the wall, and weatherstripping is for parts that move, such as doors and the sashes of operable windows. If the draft is coming from the sash itself (the part that slides or swings), new caulk on the outside frame will not fix it. Look at the sash seals or weatherstripping instead; our guide to installing weatherstripping on an exterior door covers the same basic idea for doors.
Signs your window caulk needs replacing
Walk around the house and look closely at each window. Replace the caulk where you see:
- Cracks running along or across the bead
- Caulk that has pulled away from the frame or siding, leaving a visible gap
- Pieces missing entirely
- Caulk that is hard and brittle when you press it with a fingernail
- Water stains, peeling paint, or soft wood below the window, which can mean water is already getting in
Soft wood, swollen trim, or stains on the inside wall are a warning sign. Caulk will not fix rot or a failed flashing detail, so have those checked before you seal over them.
When to do the job
The Building America Solution Center says the best time to caulk is summer, late spring, or early fall, when the weather is warm and caulk is softer and easier to work. The NFRC guide says caulk needs relatively warm temperatures, above 45°F, to set and adhere properly, and low humidity helps too. Pick a dry stretch with no rain in the forecast for at least as long as your caulk label says it needs before getting wet. Just before you paint the outside of the house is another good time, since you can caulk first and paint over a paintable product.
If you are working in November and the forecast is cold, check the label: some sealants are rated for application in lower temperatures, but many are not. If yours is not, a temporary fix such as removable rope caulk inside can wait out the winter until a warm spell.
What you'll need
The Building America Solution Center's list, plus a few extras:
- Exterior-grade caulk or sealant that matches your materials (see below)
- Caulking gun (a dripless gun with a pressure-release trigger is easier)
- Utility knife and a putty knife
- Razor scraper and a stiff brush
- Pliers for pulling out old strips
- Painter's tape (optional, for clean lines)
- Rubbing alcohol and clean rags
- Gloves and safety glasses
- Foam backer rod for gaps deeper or wider than about 1/4 inch
- A sturdy ladder for upper windows, plus a helper to steady it
Choosing the right caulk
Read the label rather than the color of the tube. You want a product that says it is for exterior use and lists the surfaces you are joining, such as wood, vinyl, aluminum, masonry, or fiber cement. The Department of Energy's air-sealing guide lists acrylic latex and silicone among common caulks. Exterior window joints are often sealed with silicone, polyurethane, or hybrid "polymer" sealants because they stay flexible outdoors, but product lines vary.
Two practical checks:
- Will you paint it? If yes, choose a caulk the label calls paintable. Standard 100% silicone generally does not accept paint.
- How big is the gap? The NFRC guide says caulk is effective for gaps no more than a quarter inch wide. For a deeper gap, push in foam backer rod first. For a very wide gap, stop and check why it is so wide.
Step 1: Find every joint that needs sealing
The Building America Solution Center says exterior caulk is commonly found around windows and doors, along trim, between different building materials, and around light fixtures, vents, and other wall penetrations. For each window, check:
- The sides of the frame where they meet the siding or trim
- The top of the frame, if your window has no separate drip cap or head flashing
- Joints between exterior trim pieces
Leave these alone:
- Weep holes or drainage slots at the bottom of the frame. They let water that gets behind the window drain out.
- The bottom edge of a storm window. Sealing it can trap water against the sill.
- Moving parts such as sashes and casement edges. Caulking them can seal the window shut; they rely on weatherstripping or gaskets.
- The drip cap or flashing above the window, if it is designed to shed water outward. Do not caulk it in a way that dams water behind it.
Step 2: Check for lead before you scrape (homes built before 1978)
If your home was built before 1978, the paint on window trim may contain lead, and scraping it creates dust that is dangerous, especially to young children and pregnant women. EPA's guidance for do-it-yourselfers recommends lead-safe work practices even though its contractor rule does not apply to homeowners working on their own homes. In practice that means:
- Keep children, pregnant women, and pets away from the work area
- Lay heavy plastic on the ground below the window to catch debris
- Mist surfaces with water before scraping; do not dry scrape or power sand
- Bag debris in heavy plastic and clean up thoroughly with wet wiping
If you are not sure whether there is lead, test it with an EPA-recognized test kit or hire a certified lead-safe contractor. EPA's Steps to Lead Safe Renovation, Repair and Painting booklet explains the full process.
Step 3: Remove the old caulk
The Building America Solution Center recommends this sequence:
- Cut along both edges of the old bead with a utility knife or putty knife. Keep the blade angled away from the window glass and frame finish.
- Pull off the strips with pliers or your fingers. Old, cracked caulk may come off in small pieces.
- Chip off any remaining bits with a razor scraper, and use a stiff brush in tight spots.
Caulk is easier to remove when it is warm. The same guide says a hair dryer or a low-temperature heat gun can soften stubborn caulk. Keep heat away from glass, vinyl frames, and painted surfaces in older homes, since heating lead paint is a hazard.
Remove all the old caulk before moving on. New caulk does not bond well to old, failing caulk.
Step 4: Clean and dry the joint
Caulk sticks best to a clean, dry seam. After scraping:
- Brush or wipe out the loose debris with a dry rag.
- Put on gloves and wipe the joint with rubbing alcohol on a clean rag, as the Building America guide recommends.
- Let it dry completely. If it rained recently, give wood time to dry out.
If the gap is deeper than about 1/4 inch, press foam backer rod into it now with a putty knife so it sits slightly below the surface. That gives the caulk a backstop and keeps the bead from being too thick.
Step 5: Tape the edges (optional)
For straight, neat lines, the Building America guide suggests running painter's tape along both sides of the joint. Leave a gap the width you want the finished bead to be.
Step 6: Apply the new caulk
- Cut the nozzle at an angle, starting small; you can always cut it larger. Puncture the inner seal if the tube has one.
- Practice on a piece of cardboard first, as the Building America guide suggests, to get a feel for the gun.
- Hold the gun at about a 45-degree angle and squeeze lightly while moving at a steady pace. Aim for one continuous bead that fills the joint and touches both sides.
- Work one side of a window at a time so the caulk does not skin over before you smooth it.
Step 7: Smooth (tool) the bead
Right after applying each section, press and smooth the bead with a gloved finger or a rounded piece of plastic such as a plastic spoon. The Building America guide says this pushes the caulk into the seam and gives a smooth finish. If you used tape, pull it off while the caulk is still wet, pulling away from the bead.
Clean any smears off siding, trim, or tools right away. The Building America guide suggests a rag dipped in rubbing alcohol or mineral spirits; for water-based latex products, check whether the label says water cleanup is enough.
Step 8: Let it cure
Follow the label for how long the caulk needs before it can get wet and before it can be painted. Do not paint until it is ready, or the paint can crack. Check the joint after the first heavy rain.
Safety notes
- Ladders: Set the ladder on firm, level ground, keep three points of contact, and do not lean out past the rails. For second-story windows, use a helper or hire the job out.
- Blades: Cut away from your body and keep fresh blades in the scraper and knife.
- Lead: In pre-1978 homes, follow EPA's lead-safe steps above.
- Ventilation and skin: Some sealants and solvents give off fumes. Read the safety section on the label, wear gloves, and keep products away from children.
When to call a pro
Call a contractor, window installer, or siding professional if:
- The wood around the window is soft, rotted, or crumbling
- There is water damage or staining inside the house below the window
- The gap is much wider than caulk is meant to fill, or keeps reopening, which can point to movement or failed flashing
- The windows are high off the ground or over a roof you cannot work on safely
- You suspect lead paint and do not want to handle containment and cleanup yourself
If you want a full picture of where your home is leaking air, the Department of Energy suggests a home energy assessment, which can test the whole house rather than just the windows.
Quick checklist
- Caulk type is exterior-rated and suits your materials
- Weather is dry and within the temperature range on the label
- Lead checked or lead-safe steps in place for pre-1978 homes
- All old caulk removed, joint cleaned with alcohol and dry
- Backer rod in any deep gaps
- Weep holes, storm-window bottoms, and moving sashes left unsealed
- Bead tooled smooth and tape removed while wet
- Cure time respected before rain or paint
Related guides
- How to Install Weatherstripping on an Exterior Door (Step by Step)
- How to Recaulk a Bathtub: Step-by-Step for a Clean, Watertight Seal
- Fall Home Maintenance Checklist: 15 Tasks Before Winter
Sources and further reading
- Building America Solution Center (PNNL/DOE): Caulk Exterior Walls
- U.S. Department of Energy: Consumer Guide to Air Sealing the Home (PDF)
- NFRC Consumer Guide to Windows: Caulking and Weatherstripping
- U.S. EPA: Frequent Questions for Do-It-Yourselfers and the RRP Rule
- U.S. EPA: Steps to Lead Safe Renovation, Repair and Painting (PDF)
Sources checked 2026-11-09. Products and building details vary. Follow your caulk manufacturer's label and local codes, and if something here doesn't match your home, let us know.
Frequently asked questions
What temperature do I need to caulk windows outside?
The NFRC consumer guide to windows says relatively warm temperatures, above 45°F, are needed for caulk to set properly and stick, and that low humidity matters too. The Building America Solution Center recommends summer, late spring, or early fall. Always check the temperature range printed on your caulk tube, because products differ.
What kind of caulk should I use on the outside of windows?
Use a caulk labeled for exterior use and for the materials you are joining, such as wood, vinyl, aluminum, brick, or fiber cement. Many exterior sealants are silicone, polyurethane, or hybrid formulas. If you plan to paint the joint, pick one the label says is paintable, since standard silicone usually is not. Follow the manufacturer's instructions for cure time and rain exposure.
How wide a gap can caulk fill?
The NFRC guide says caulk provides an effective, flexible seal for cracks and joints no more than a quarter inch wide. For deeper or wider gaps, press in a foam backer rod first so the caulk bead stays a reasonable size, or check the caulk label for its maximum joint width. Very large gaps can mean failed flashing or rot and are worth having a pro inspect.
Should I caulk the bottom of the window or the weep holes?
Do not seal weep holes or drainage slots on the bottom of the window frame, and do not caulk across the bottom of a storm window. Those openings let water that gets behind the window drain out. Blocking them can trap water against the sill and cause rot.
Is it safe to scrape old caulk on an older house?
If your home was built before 1978, the paint and some old glazing materials around windows may contain lead. EPA recommends lead-safe practices for do-it-yourselfers: keep children and pregnant women away, cover the ground with plastic, mist surfaces before scraping instead of dry scraping, and clean up carefully. Consider testing first, or hire a lead-safe certified contractor.