How to Recaulk a Bathtub: Step-by-Step for a Clean, Watertight Seal
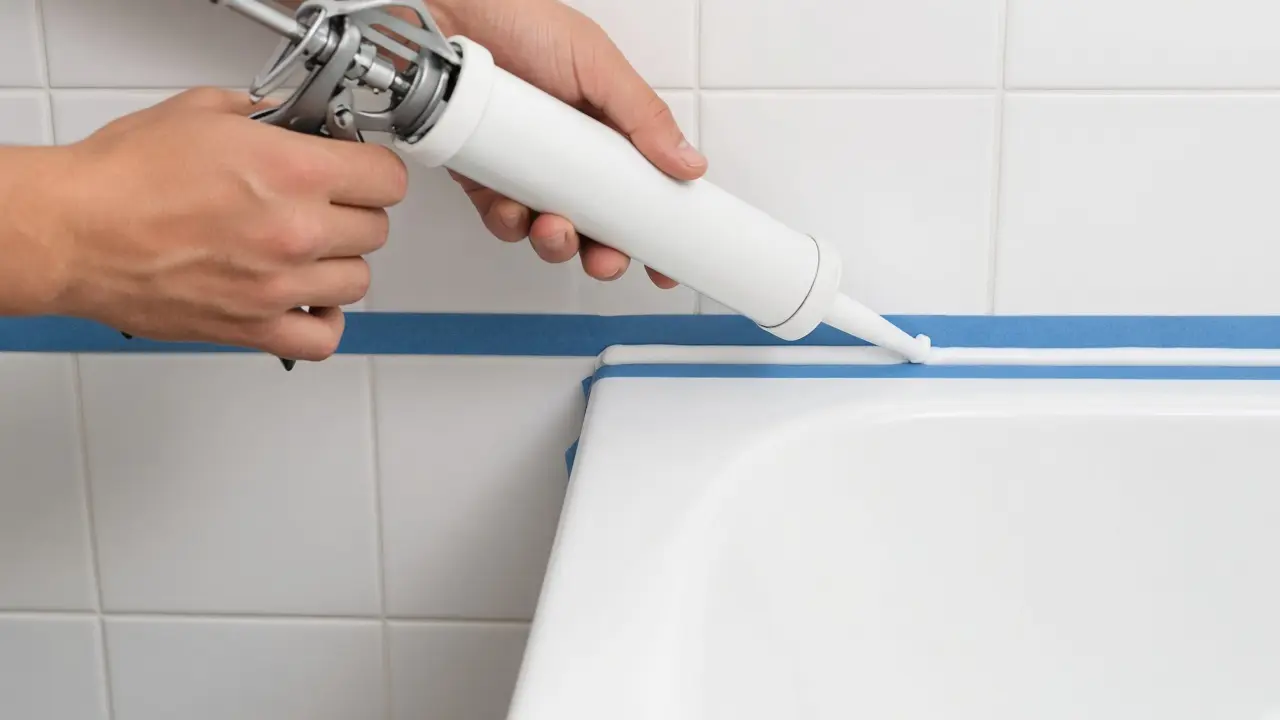
The caulk line where your bathtub meets the wall does an important job: it keeps water out of the gap, away from the wall framing and subfloor. When caulk turns black with mold, peels or cracks, it's time to replace it. Recaulking is one of the most satisfying DIY jobs because it's inexpensive, takes an afternoon (plus curing time), and makes a bathroom look instantly cleaner.
Tools and materials
- Caulk: 100% silicone or a siliconized product labelled for tub, tile and bath use, with mildew resistance. White or clear is most common.
- Caulk gun (a dripless model with a smooth trigger makes life easier)
- Caulk removal tool or a plastic putty knife
- Utility knife or razor blade scraper
- Painter's tape
- Rubbing (isopropyl) alcohol and clean rags
- Optional: silicone caulk remover gel for stubborn residue
- Mold cleaner or a diluted bleach solution, if there's mold (never mix bleach with ammonia or acids)
- Gloves, and a fan or open window for ventilation
Step 1: Remove the old caulk completely
New caulk won't bond to old caulk, and mold under the old bead will come right back through. Take the time to strip it all.
- Run a utility knife along both edges of the old bead, where it meets the tub and where it meets the tile, to break the bond.
- Use a caulk removal tool or plastic scraper to lift the bead out. Pull long strips by hand where you can.
- Scrape remaining residue with a razor scraper held at a low angle. Be careful on acrylic or fiberglass tubs, which scratch easily; use plastic tools there.
- For thin silicone film that won't come off, apply a silicone caulk remover per its directions, wait, then scrape again.
Step 2: Kill mold and clean the joint
- If you see mold in the gap, clean it with a bathroom mold cleaner or a bleach solution following the product directions. Ventilate the room.
- Rinse with water and let it dry.
- Wipe the joint with rubbing alcohol on a clean rag to remove soap residue and oils. This step makes a big difference in how well the new caulk sticks.
- Let it dry fully. Caulk applied over moisture won't bond well. Many pros wait several hours or overnight, and run a fan to speed it up.
Step 3: Fill the tub with water
This is the step most people skip. A tub full of water and a person weighs much more than an empty tub, and that weight can flex the tub slightly, widening the joint. Caulking with the tub filled means the bead is set at its "wide" position, so it's less likely to tear when the tub is used. Fill it to the overflow and leave the water in until the caulk has cured to the point the label allows.
Step 4: Tape the joint
Apply painter's tape along both sides of the gap: one strip on the wall about 1/8 inch above the joint, one on the tub about 1/8 inch below it. Tape gives you perfectly straight edges and makes cleanup simple. Press the tape edges down firmly so caulk can't creep under.
Step 5: Cut the nozzle and load the gun
- Cut the tube's nozzle at a 45-degree angle, starting with a small opening, about 1/8 inch. You can always cut more.
- Puncture the inner foil seal with the wire on the caulk gun (or a long nail).
- Load the tube and squeeze until caulk reaches the tip.
Step 6: Apply the bead
- Start in a corner. Hold the gun at about a 45-degree angle to the joint.
- Squeeze steadily while moving at a constant speed, pushing the bead slightly ahead of the nozzle so caulk is forced into the gap. Aim for a continuous bead that fills the joint and touches both strips of tape.
- Work in sections of a few feet, especially with silicone, which starts to skin over within minutes.
- At the end of each run, release the trigger and pull back so the gun stops pushing caulk.
Step 7: Tool (smooth) the bead
Right after applying each section, smooth the bead to press it into the joint and give it a concave finish.
- Use a caulk finishing tool, or a fingertip in a disposable glove.
- Some people lightly mist the bead with soapy water for silicone, or dampen the finger. Check your product's instructions.
- Use one smooth, steady pass. Wipe excess off the tool frequently with a rag.
Step 8: Remove the tape right away
While the caulk is still wet, pull the tape off slowly at a 45-degree angle, away from the bead. If you wait until it cures, the tape can tear the edges. If the edge lifts slightly, very gently press it down with a gloved finger.
Step 9: Let it cure
Leave the tub filled and don't use the shower until the product's cure time has passed, commonly 24 hours for bath silicones, though quick-set formulas vary. Keep the room ventilated. Then drain the tub.
Tips for a professional finish
- Practice first on a strip of cardboard to get the feel of gun speed.
- Corners: Approach from each direction toward the corner and blend them together while tooling.
- Big gaps: If a gap is wider than about 1/4 inch, push backer rod into it first so the caulk doesn't sink in.
- Mistakes: Wipe uncured silicone off with a dry rag first, then a rag with a little rubbing alcohol. Cured silicone has to be cut and scraped.
Safety notes
- Ventilate well when using mold cleaners, removers and silicone, which releases fumes as it cures.
- Never mix bleach with ammonia, vinegar or other cleaners.
- Wear gloves and eye protection when scraping.
- Cut away from your hands with utility knives and razor scrapers.
How long does bathtub caulk last?
It varies with the product, how well the surface was prepared, and how the bathroom is ventilated. Inspect it every few months. Replace it as soon as you see gaps, peeling, or mold you can't clean off the surface. Running the bathroom fan during and after showers helps the caulk, and the rest of the room, stay mold-free.
When to call a professional
If the wall tile is loose, the grout is crumbling behind the caulk line, or the wall feels soft when pressed, water may have already gotten behind the tile. Recaulking won't fix that. Have a contractor check for water damage before resealing.
Done carefully, a fresh caulk line looks sharp and protects your bathroom for a long time. The secret isn't skill with the gun; it's prep: complete removal, a clean, dry joint, tape, and a filled tub.
Related guides
Sources and further reading
- EPA: A brief guide to mold, moisture and your home
- EPA: Mold
- The caulk or grout manufacturer's label for cure time before water exposure
Sources checked October 23, 2026. If something here does not match your product's manual, follow the manual and let us know.
Frequently asked questions
Should I use silicone or acrylic caulk for a bathtub?
100% silicone or a siliconized product labelled for kitchen and bath use is the usual choice because it stays flexible and resists water. Pure silicone is harder to tool and can't be painted. Follow the product label.
Can I caulk over old caulk?
It's not recommended. New caulk won't bond well to old caulk, especially silicone, and any mold underneath stays trapped. Remove the old bead completely first.
How long before I can shower after caulking?
It depends on the product. Many bathroom silicones list 24 hours before water exposure, and some quick-cure formulas are shorter. Check the tube.
Why does my caulk keep cracking?
Common causes are caulking over a dirty or damp surface, using a rigid product, or caulking with the tub empty so the joint widens when the tub is filled. Filling the tub with water before caulking helps.